
In Persons & Institutions | Insurance Companies, practices can add, edit, and manage insurance companies. The following sections will describe navigation of the feature, adding and editing insurance company information, setting up financial classes and fee schedules, and downloading (exporting) and uploading (importing) fee schedules. For the billing process to be successful, ensure there is complete information in the required insurance fields.
To access Insurance Companies, navigate to Persons & Institutions | Insurance Companies.
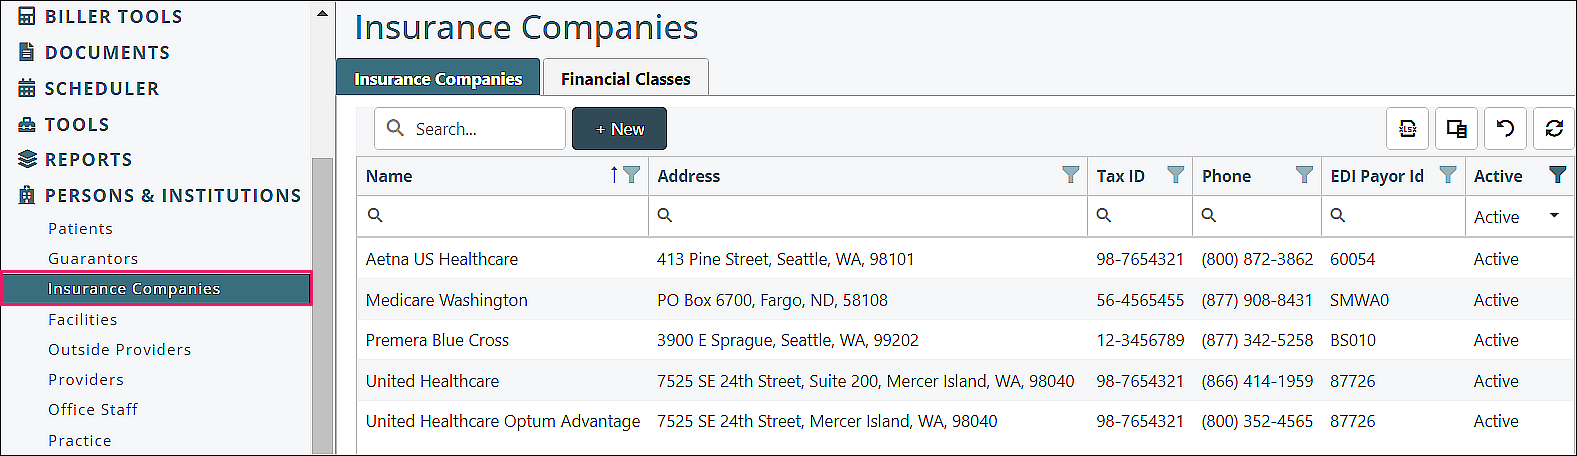
Insurance Companies Navigation
Insurance Companies tab
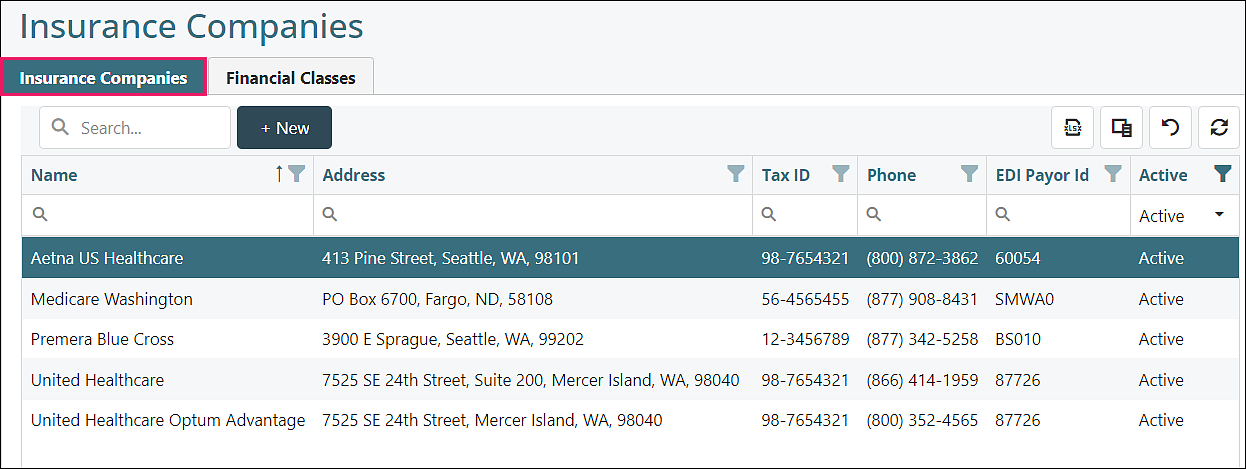
Top Row
- Search: Type in text to select added insurance companies to appear
- +New: Click to add insurance companies to the selections (see section below on adding an insurance)
Top Right Icons
 |
Exports the current view to an Excel spreadsheet |
 |
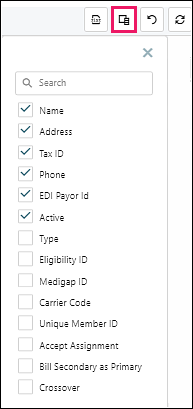
Provides list of options to customize which columns appear |
| Removes all filters that have been set for any field | |
 |
Refreshes data if any changes were made |
Column Filtering Tools

- Filter Icon: Click on icon and check boxes to display selected column data, click OK to save filtered selections
- Reorder arrow: If clicked, updates list order to ascending or descending
- Search Icon Field: Type in text to select specific column data
Column Options
Check or uncheck column options to display only desired data
Click on/Open an Insurance for Tab Options
Insurance Company tab

Fields
- Type (shown in Box 1 of CMS 1500): category of insurance, data populated by Valant, regulatory information
- Name, Address, City, State, Zip: information found on back of insurance card, where paper claims are mailed
- Phone: located on back of insurance card, shows on aging reports
- Financial Class (optional): a way to group insurance companies under a single Fee Schedule, see Financial Classes section below
- Tax ID (optional): identification assigned to insurance company for tax purposes, see ERA - Match Charge to Payment article for more information
- EDI Payor ID (optional): Electronic Data Interchange identification unique to the insurance company and used to transmit electronic claims, located on the clearinghouse website, see EDI Payer ID List article for details
- Eligibility ID (optional): identification unique to the insurance company and used to check patients’ coverage eligibility, located on the clearinghouse website
- Medigap ID (optional): identification unique to the supplemental insurance company
- Carrier Code (optional): number used by Medicaid payers to identify the primary payer
Crossover checkbox (optional): checked if the claim is automatically rolled by Medicare to the secondary payer with Medicare payment details
Inactive checkbox (optional): checked if insurance is no longer used
Display in PPM/MYIO Portal checkbox (optional): allows insurance to show in patient/prospective patient insurance drop-down options
When Provider is not Contracted options:
- Bill Insurance: selected by default, patient’s primary insurance will be billed first
- Bill Secondary as Primary: patient’s secondary insurance will be primary for the charge, patient’s primary insurance will not be billed for the charge
- Skip Primary and COB includes Charge as Non-Covered Amount: patient’s primary and secondary insurances are on the charge, but the primary is not automatically billed, the secondary is automatically billed. No response from the primary is posted so the charge amount is sent to the secondary insurance within the COB (Coordination of Benefits)
Provider Information tab
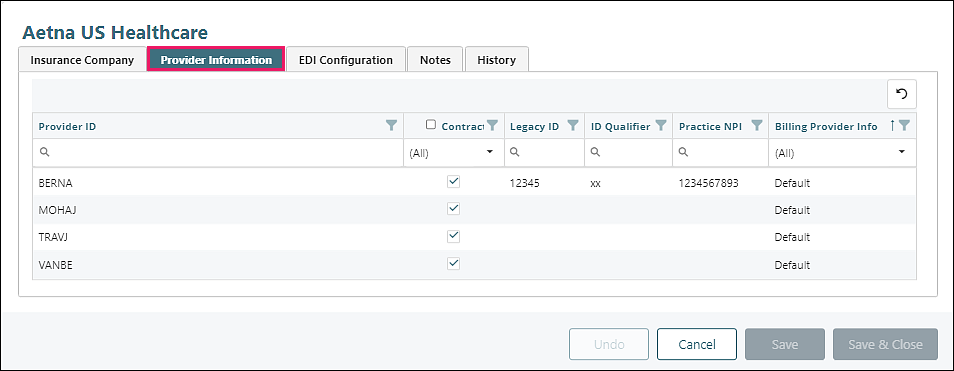
See Persons & Institutions | Providers article for more information on provider set up and information in Valant
Clear filters icon top right
| Removes all filters that have been set for any field |
Column Filtering Tools
- Filter Icon: Click on icon and check boxes to display selected column data, click OK to save filtered selections
- Reorder arrow: If clicked, updates list order to ascending or descending
- Search Icon Field: Type in text to select specific column data
Column Header Options
- Provider ID: The identification assigned to the provider in Valant
- Contracted: Checked if provider is contracted with this insurance company
- Legacy ID: The identification assigned to the provider by the insurance company
- ID Qualifier: Two digit code to indicate what the Legacy ID represents
- Practice NPI: The identification registered for the practice in the National Provider Identification registry
- Billing Provider Info: Shows Default when practice info is used, is editable for manual override of billing provider information
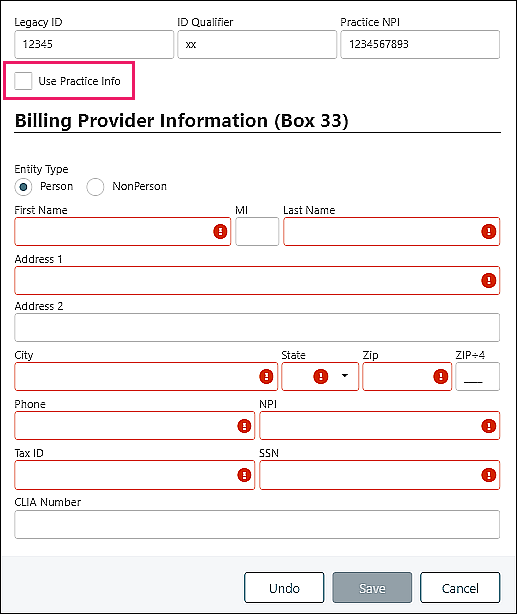
To Edit Billing Provider Information
Click on a provider, uncheck “Use Practice Info” box
- Legacy ID: The identification assigned to the provider by the insurance company
- ID Qualifier: Two digit code to indicate what the Legacy ID represents
- Practice NPI: The identification registered for the practice in the National Provider Identification registry
Use Practice Info checkbox: checked by default, uses information from Persons & Institutions | Practice | Billing Info tab. If unchecked, users can override the information using this form for this provider and insurance information on claims
Entity Type
- Person: Individual provider
- Nonperson: An organization or institution
Name, Address, Phone: Information for the person or nonperson
NPI: National Provider Identification for the person or nonperson
Either Tax ID or SSN is required
- Tax ID: Tax Identification for person or nonperson
- SSN: Social Security number for person (does not appear for nonperson)
CLIA Number (optional): Lab certification number assigned for lab services billing
EDI Configuration tab
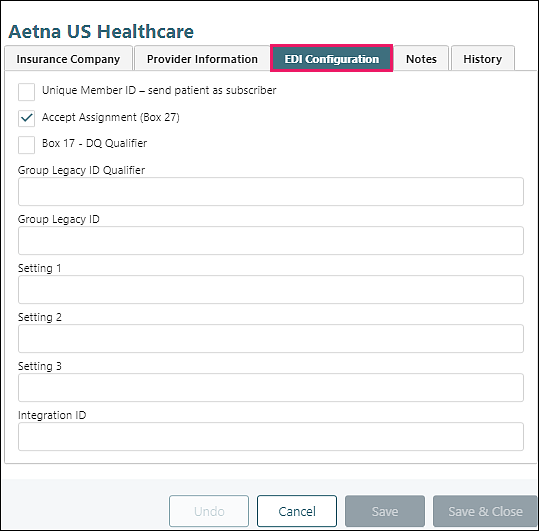
- Unique Member ID – send patient as subscriber checkbox: If the patient has a unique member identifier assigned by the payer, then the patient is considered to be the plan subscriber and is sent as the subscriber
- Accept Assignment (Box 27) checkbox: If this box is checked, the provider agrees to charge no more than the amount the insurance company is contracted to pay. This appears in box 27 of the CMS 1500 form
- Box 17 – DQ Qualifier checkbox: If this box is checked, when a claim includes an incident-to supervisor the supervisor’s NPI will be included in Box 17, along with the qualifier code “DQ”
- Group Legacy ID Qualifier: Two digit code to indicate what the Group Legacy ID represents
- Group Legacy ID: The identification assigned to the group by the insurance company
- Setting 1, 2, 3:
- Integration ID: ID used by external, non-clearinghouse vendors
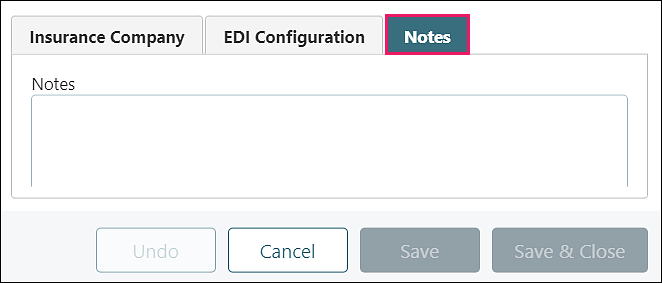
Notes tab
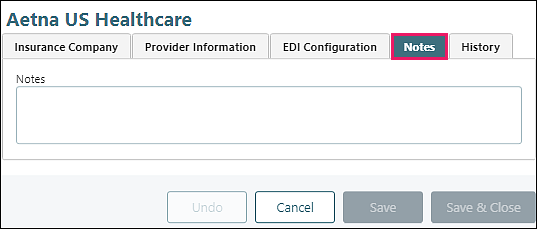
Type in specific information about this insurance company
History tab
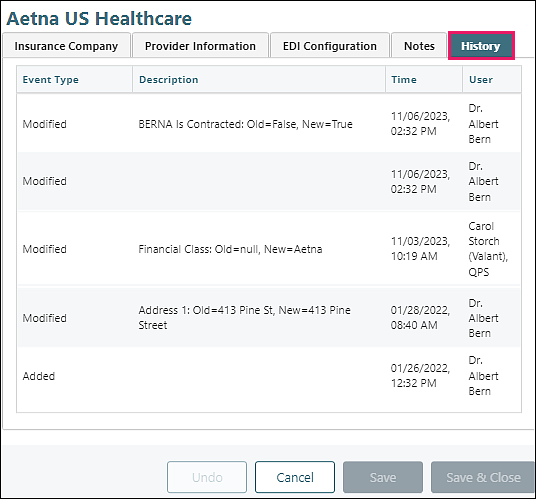
List of updates to the insurance company screens - shows event type, description, time and user
DeleteAdding an Insurance
Navigate to Persons & Institutions | Insurance Companies
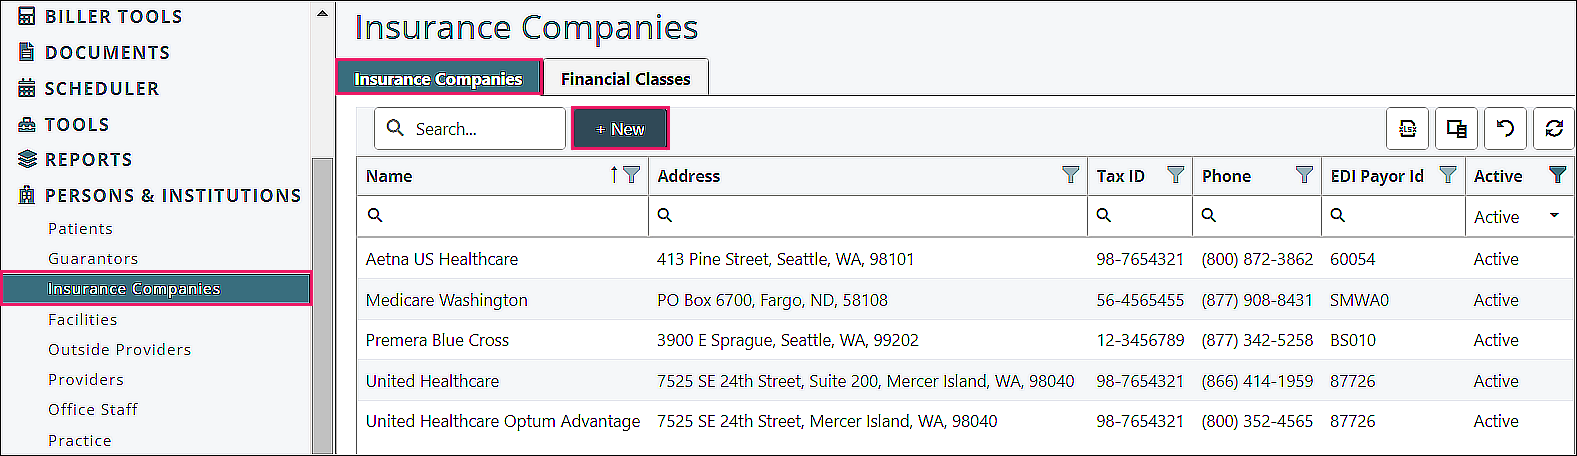
From the Insurance Companies tab, click +New
Insurance Company tab
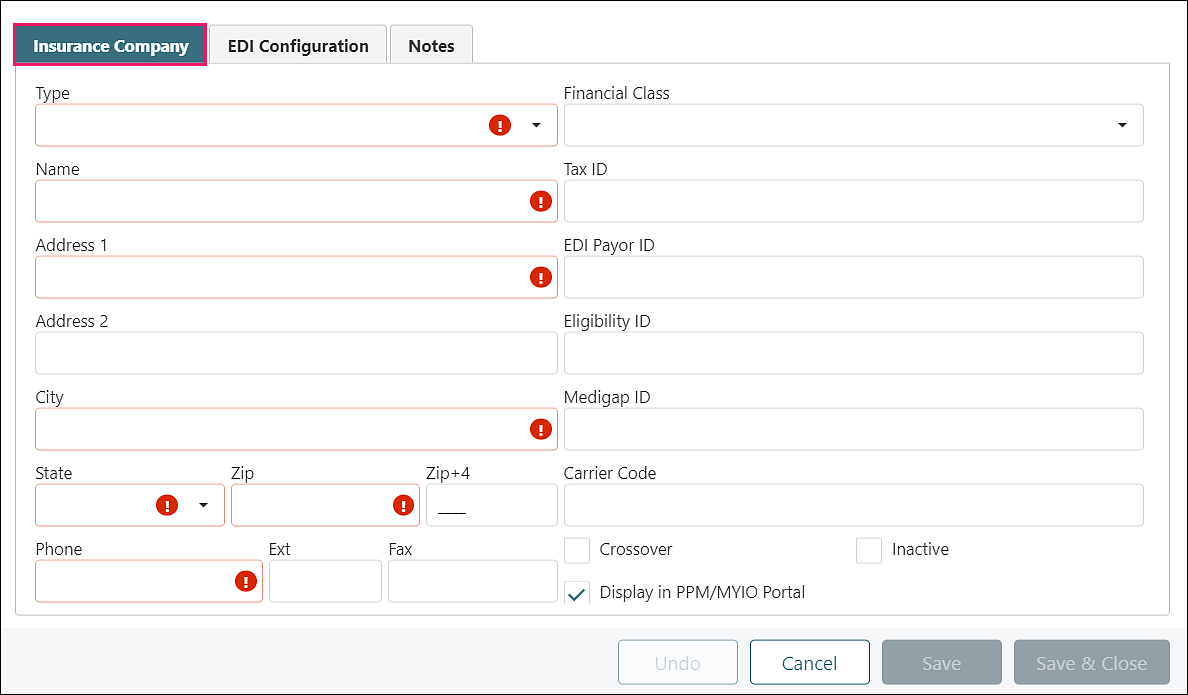
- Type (shown in Box 1 of CMS 1500): required, category of insurance, data populated by Valant
- Name, Address, City, State, Zip: required, information found on back of insurance card, where paper claims are mailed
- Phone: required, located on back of insurance card, shows on aging reports
- Financial Class (optional): a way to group insurance companies under a single Fee Schedule, see Financial Classes section below
- Tax ID (optional): identification assigned to insurance company for tax purposes, see ERA - Match Charge to Payment article for more information
- EDI Payor ID (optional): Electronic Data Interchange identification unique to the insurance company and used to transmit electronic claims, located on the clearinghouse website, see EDI Payer ID List article for details
- Eligibility ID (optional): identification unique to the insurance company and used to check patients’ coverage eligibility, located on the clearinghouse website
- Medigap ID (optional): identification unique to the supplemental insurance company
- Carrier Code (optional): number used by Medicaid payers to identify the primary payer
- Crossover checkbox (optional): check if the claim is automatically rolled by Medicare to the secondary payer with Medicare payment details
- Inactive checkbox (optional): check if insurance is no longer used
- Display in PPM/MYIO Portal checkbox (optional): checked by default, allows insurance to show in patient/prospective patient insurance drop-down options
Enter insurance company information, click Save
EDI Configuration tab
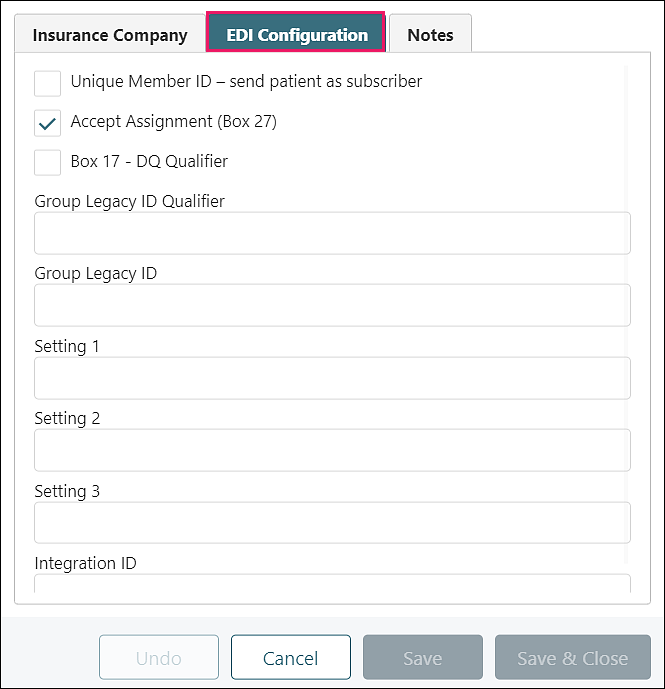
- Unique Member ID – send patient as subscriber checkbox: If the patient has a unique member identifier assigned by the payer, then the patient is considered to be the plan subscriber and is sent as the subscriber
- Accept Assignment (Box 27) checkbox: If this box is checked, the provider agrees to charge no more than the amount the insurance company is contracted to pay. This appears in box 27 of the CMS 1500 form
- Box 17 – DQ Qualifier checkbox: If this box is checked, when a claim includes an incident-to supervisor the supervisor’s NPI will be included in Box 17, along with the qualifier code “DQ”
- Group Legacy ID Qualifier: Two digit code to indicate what the Group Legacy ID represents
- Group Legacy ID: The identification assigned to the group by the insurance company
- Setting 1, 2, 3:
- Integration ID: ID used by external, non-clearinghouse vendors
Enter EDI Configuration information as applicable, click Save
Notes tab
Type in specific information about this insurance company if needed, click Save
Review all information entered for the insurance company (in all tabs), click Save & Close
DeleteFinancial Classes
Financial Classes are a way to group insurance companies under a single Fee Schedule. An Insurance Company can only have one Financial Class.
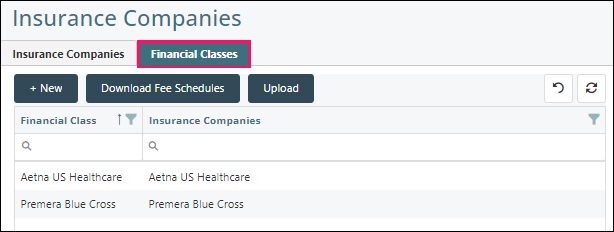
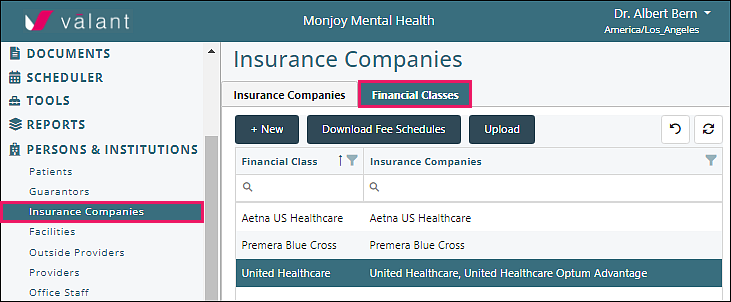
Navigate to Persons & Institutions | Insurance Companies | Financial Classes tab
Page Components
Top Row
- +New: Click to add a Financial Class
-
Download Fee Schedules and Upload (see description in below Fee Schedules section):
- Download Fee Schedules: exports a csv file of all Fee Schedules
- Upload: imports a csv file of the downloaded file including any modifications in the file
Top Right Icons
| Removes all filters that have been set for any field | |
 |
Refreshes data if any changes were made |
Column Filtering Tools

- Filter Icon: Click on icon and check boxes to display selected column data, click OK to save filtered selections
- Reorder arrow: If clicked, updates list order to ascending or descending
- Search Icon Field: Type in text to select specific column data
Column Headers
- Financial Class: group/classification of insurance companies
- Insurance Companies: insurance companies included in the financial class
Adding a Financial Class
Click +New
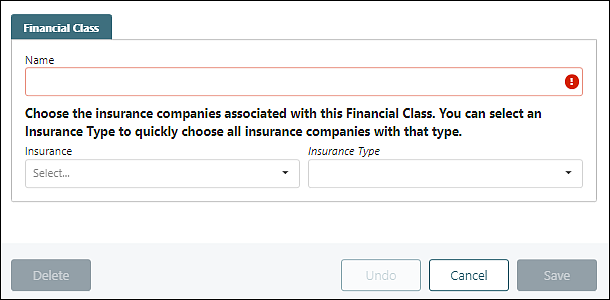
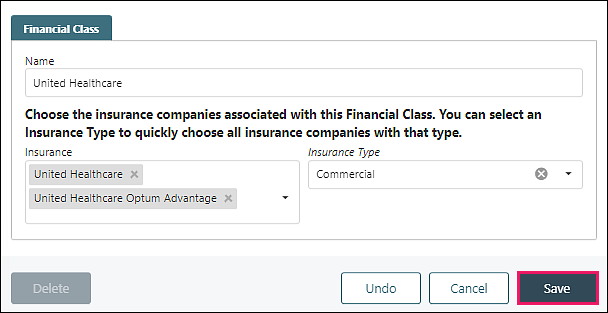
Name: Enter a brief name descriptive of the group of insurances linked to the Financial Class (e.g., “BCBS Network”, “Medicare Payers”, “Commercial Payers”, etc.). This name will be displayed along with the Fee Schedule Version name in appointment and Create Charge pages (e.g., “BCBS Network: Prescribers”).
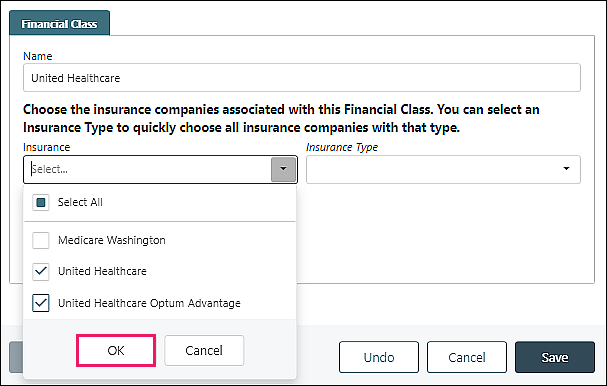
"Insurance" drop down: displays insurance companies not already associated with a financial class, check boxes to add insurance companies to the financial class, click OK
Note: 0 to all Insurances may be added to a single Financial Class (an insurance cannot be in multiple Financial Classes)
“Insurance Type” drop down: allows the user to narrow down the options in the insurance drop down list if insurance type is associated with the insurance company. If insurance companies are added through an import, the insurance type is not added automatically and should be updated manually. See Insurance Types article for more information.
Click Save to add the “Financial Class”
Managing a Financial Class
Click on/Open a Financial Class
Financial Class tab
Edit and associate insurance companies with a Financial Class
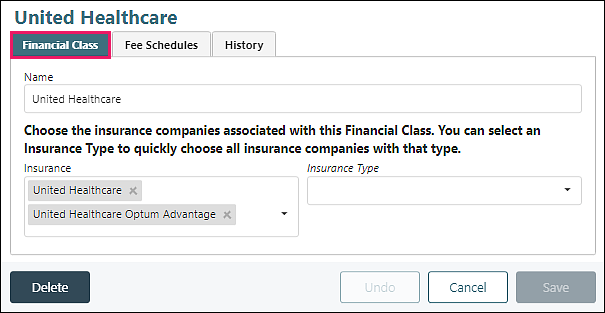
- Name: editable
- Insurance: editable, add from drop down options, remove by clicking ‘X’ by insurance name
- Insurance Type: use to add other insurance companies to the Financial Class
- Delete: removes the Financial Class
Click Save to update any changes made
Fee Schedules tab (see Fee Schedules section for details)
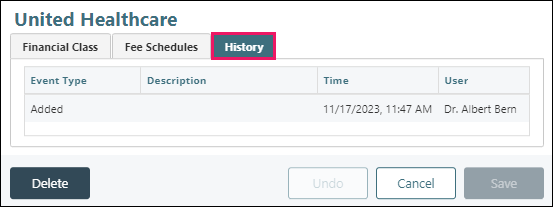
History tab
Shows all activity for the Financial Class
Fee Schedules
Fee Schedules allow practices to accommodate unique requirements established by each insurance company and allow practices to bill different amounts for providers with different Billing Types. Fee Schedules also allow practices to track accuracy of payments for insurance companies by entering the contractual rate.
Note: Fee Schedules are a complex component to the system. Time should be taken to fully understand this feature as improper use can cause serious repercussions.
A Financial Class needs to be set up prior to adding a Fee Schedule. See Financial Classes section for more information on navigating the Insurance Company page and adding a Financial Class.
Accessing a Fee Schedule
Click on Persons & Institutions | Insurance Companies | Financial Classes tab.
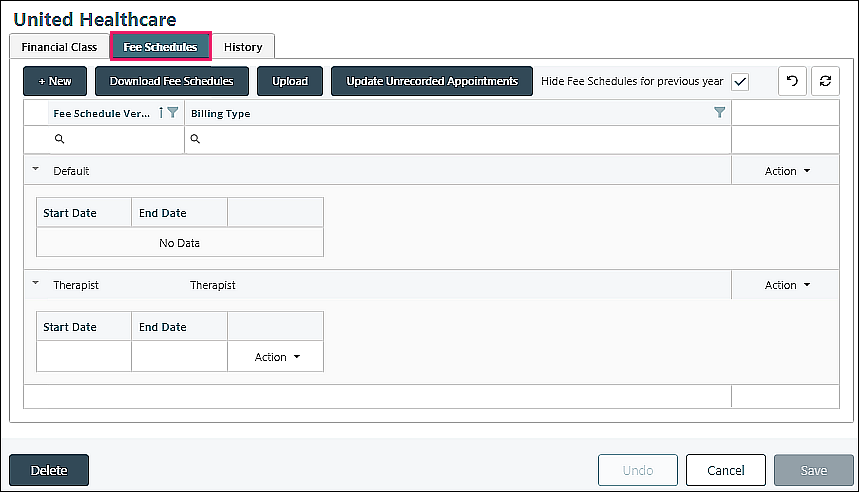
Select a Financial Class from the list, select the Fee Schedules tab
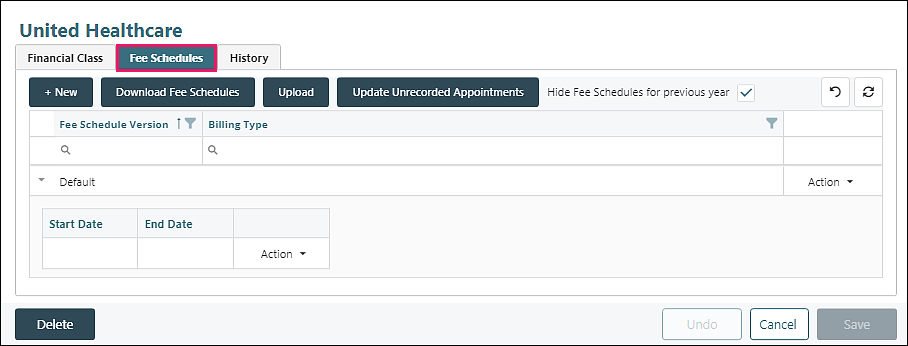
Fee Schedules Tab Navigation
Top Row
- +New: Click to add a new fee schedule
- Download Fee Schedules: exports the selected fee schedule as a csv file
- Upload: imports the fee schedule from a csv file
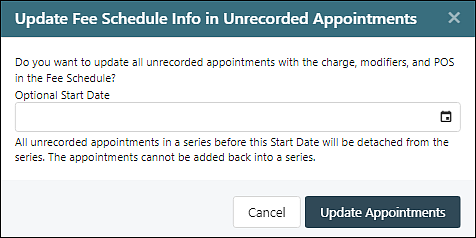
- Update Unrecorded Appointments: opens a window to allow revisions once a fee schedule or version has been updated
- Hide Fee Schedules for previous year checkbox
Top Right Icons
| Removes all filters that have been set for any field | |
 |
Refreshes data if any changes were made |
Column Filtering Tools

- Filter Icon: Click on icon and check boxes to display selected column data, click OK to save filtered selections
- Reorder arrow: If clicked, updates list order to ascending or descending
- Search Icon Field: Type in text to select specific column data
Columns
- Fee Schedule Version: displays any versions associated with the Fee Schedule (usual multiple if date ranges are populated). If Hide Fee Schedules for previous year is checked, old versions will not be displayed.
- Billing Type: displays information from Reference Data | Billing Types (Default Fee Schedules do not have Billing Types)
- Actions: provides drop-down list of options for management or addition of fee schedules
Creating the Initial Fee Schedule
The first Fee Schedule created will be the Default. Click +New

Fee Schedule Name: the first fee schedule added for a financial class will be named “Default” and cannot be edited.
Start Date/End Date: may be left blank, manually populated if rates change
Billing Type: Not editable
- The Default Fee Schedule has no billing types associated because it is always used for dates of service within the defined date range unless there is a Fee Schedule Version for a billing type that matches the provider.
- When an Incident-To Supervisor is present on the appointment (or charge) the billing type of the supervisor determines the Fee Schedule.
Action: drop-down options appear once the Fee Schedule is saved
Clear filters icon top right
| Removes all filters that have been set for any field |
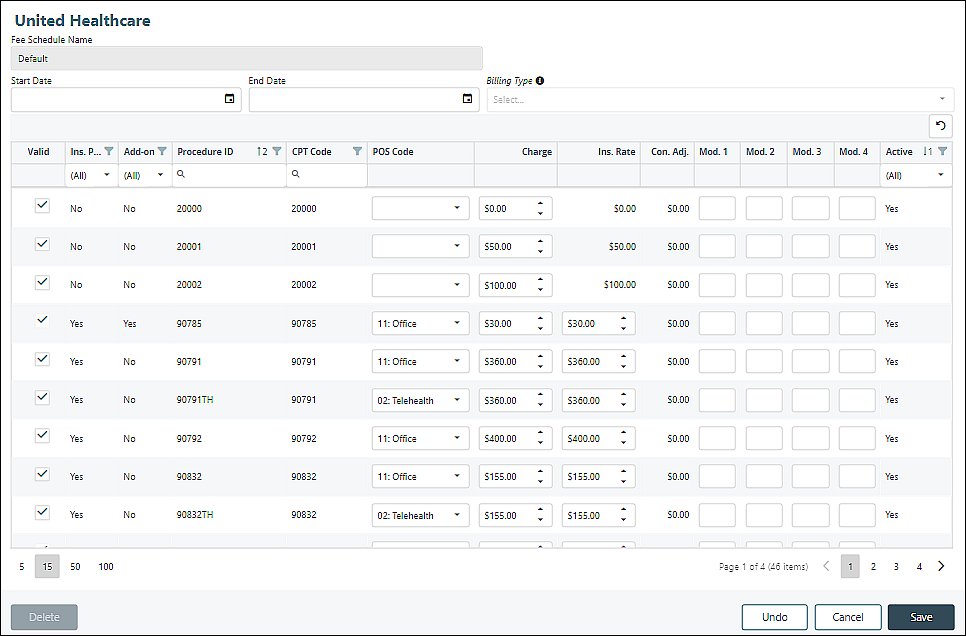
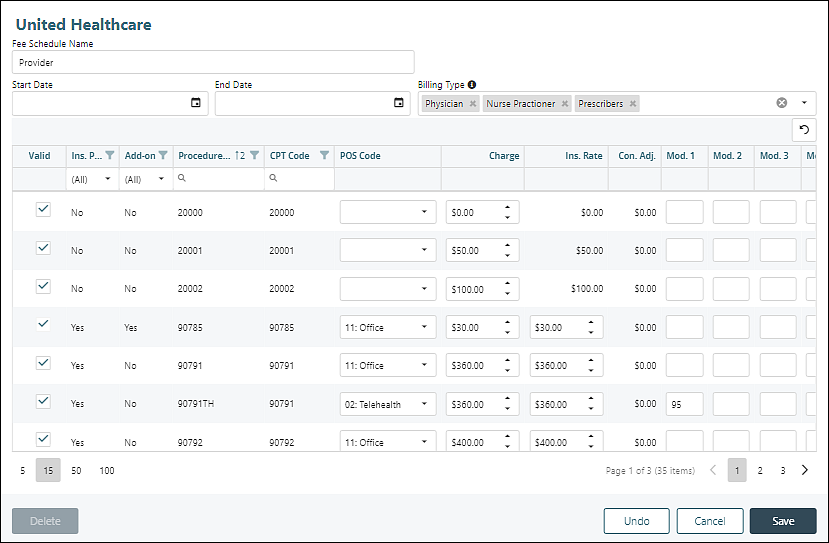
Columns
- Valid: Checked by default. If checked, the transaction code will be included in the fee schedule
-
Column data pulled from information in Transaction Codes | Procedures. See Procedures article for more information
- Ins. Procedure: “Yes” if Insurance Procedure checkbox checked.
- Add-on: “Yes” if Is Add-On Charge checkbox checked.
- Procedure ID: Transaction Code ID field
- CPT Code: CPT Code field
- POS Code: Places Of Service field, editable
- Charge: Fee field, editable
- Ins. Rate: Fee field, editable
- Con. Adj.: $0.00 by default, automatically updates if Ins. Rate is populated
- Mod. 1, 2, 3, 4: Manually populated based on insurance requirements
- Active: “Yes” if Procedure code is Active in Transaction Codes | Procedures. Inactive codes are visible and editable, in case unrecorded appointments have inactive procedure codes.
Manage View Options Beneath Table
 |
Number of rows per page |
 |
Total rows in parentheses and view more pages using < > arrows |
Adjust editable fields if needed, click Save
The Default Fee Schedule cannot be deleted.
Copy Fee Schedule or Fee Schedule Version
Reasons to create additional fee schedules or fee schedule versions:
- Multiple billing types are used for different reimbursement rates
- Insurance companies may require different modifiers for different provider billing types
- Practice may choose to bill different rates for different provider billing types
- Fee schedule may need to be copied because rates have been updated by insurance company or practice
See the Billing Types article for categorizing different providers in the practice.
From Persons & Institutions | Insurance Companies, click Financial Classes tab. Select from Financial Class list, click Fee Schedules tab.
Creating a copy of a fee schedule can happen by selecting "Create a copy" from the Action drop-down options in multiple locations.
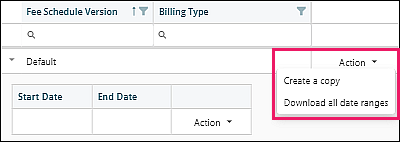
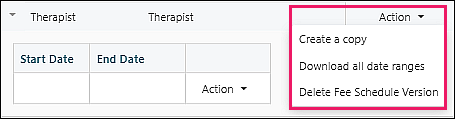
Action options from Default fee schedule far right
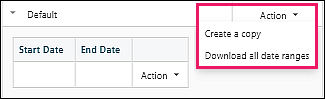
- Create a copy
- Download all date ranges
The Default fee schedule cannot be deleted.
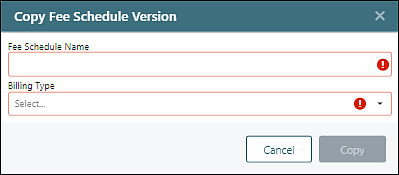
Click Create a copy to bring up a separate window.
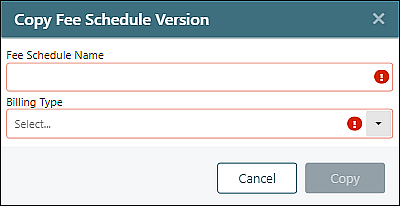
The Fee Schedule Name should be brief. It will display on the appointment under the Financial Class name.
The Billing Type list will populate from Reference Data | Billing Types
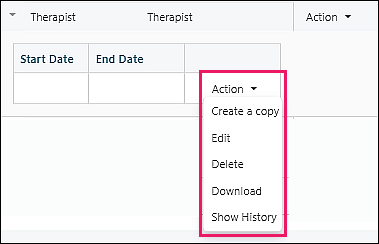
Action options from Default fee schedule version
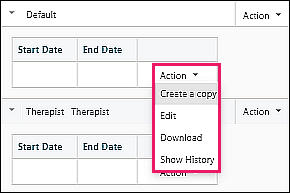
- Create a copy
- Edit
- Download
- Show History: displays the audit history of this Fee Schedule
The Default fee schedule version cannot be deleted.
Click Create a copy
The Start/End Date and information in the table can be edited
The Default Fee Schedule version has no billing types associated because it is always used for dates of service within the defined date range unless there is a Fee Schedule Version for a billing type that matches the provider.
When an Incident-to Supervisor is present on the appointment (or charge) the billing type of the supervisor determines the Fee Schedule.
Each billing type can only be associated with one Fee Schedule Version per Financial Class.
Notes:
- If dates are entered, they cannot overlap with an existing version of the fee schedule that is being copied
- If a practice only needs one fee schedule, the Default versions should be used.
- If a practice needs different fee schedules for billing types, additional fee schedules should be created
Action options from non-Default fee schedule far right
- Create a copy
- Download all date ranges
- Delete Fee Schedule Version
Click Create a copy to open the "Copy Fee Schedule Version" window
Enter "Fee Schedule Name" and select "Billing Type" from the drop-down options and click Copy to save the Fee Schedule
Action options from non-Default fee schedule version
- Create a copy
- Edit
- Delete
- Download
- Show History: displays the audit history of this Fee Schedule
Click Create a copy
Make any desired edits and click Save
Updating Unrecorded Appointments
When a fee schedule is edited or copied, a window appears to ask if unrecorded appointments should be updated with the new information.
Fee Schedule on the Appointment Window
After a Fee Schedule has been created and in use, users will see a message on the appointment window showing which financial class and fee schedule is in use when scheduling or editing an appointment. This helps the user identify why a code might have a different charge amount than the default for the code. This message will also appear when the fee schedule pertains to the add-on code.
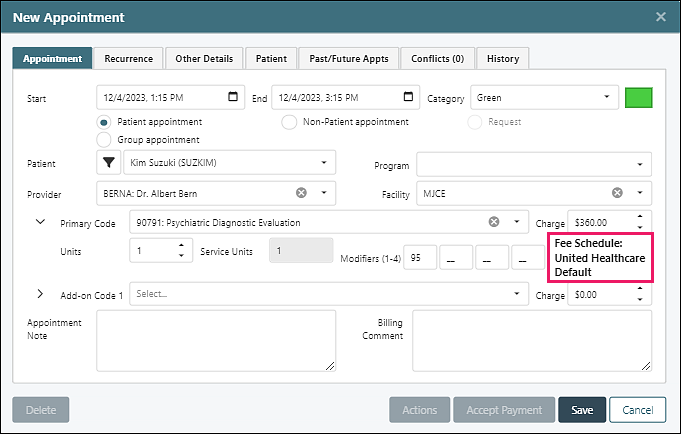
Note: This text showing Financial Class and Fee Schedule Name only appears when the Primary/Add-on Code is being added/modified in the New Appointment/Edit Appointment Window. Once the appointment is saved, it will not appear when the appointment is reopened unless the provider or code is changed, at which point the system pulls the fee schedule and displays the applied Financial Class and Fee Schedule Name.
Fee Schedule Scenarios
If a practice only needs one fee schedule, the Default versions should be used. This is because the Default Fee Schedule applies to all providers, as it is used when no other Fee Schedules can be applied to a charge.
Verify / Track Insurance Rates
Some practices have providers with different credentials. Insurance companies can pay different rates, based on the provider’s credentials. When a practice chooses to track insurance contract rates by each provider’s credentials, a financial class will need to be created for each insurance. This will allow the rate to be entered on each transaction code.
- Create a Financial Class (e.g. BCBS PPO)
- Select insurance companies that pay the same rates
- Add a Default Fee Schedule – include appropriate telehealth modifiers for this payer
- Copy the Default Fee Schedule – Change the “Fee Schedule Version” name in the csv file according to the Billing Type(s) (e.g., Therapists). Note that this name will be visible when users add appointments or charges.
- Assign Billing Type(s) - add the Billing Type “Name” from Reference Data | Billing Types (e.g., Psychologist)
- Enter the rate for each code that will be paid for this Billing Type(s)
- Copy this Fee Schedule – Change the “Fee Schedule Version” name in the csv file according to the Billing Type(s) (e.g., Prescribers)
- Assign Billing Type(s) - add the Billing Type “Name” from Reference Data | Billing Types (e.g., MD)
- Enter the rate for each code that will be paid for this Billing Type
In summary, when a payment is received for a provider on a code that is attached to a fee schedule, it will cross reference the payment with the expected rate and let you know if it doesn’t match. In addition, there are several reports that will provide you with the Net Accounts Receivable.
Provider Modifiers Required by Insurance
E.g., Medicare GY modifier
Some insurance companies require that a modifier is used for services rendered by specific provider credentials. This requires a fee schedule with the modifiers assigned to the appropriate codes for each bill type that represents the provider’s credentials. This will populate the appropriate modifiers for each provider.
- Create a Financial Class (e.g., Medicare Payers)
- Select insurance companies that have the same modifier requirements
- Add a Default Fee Schedule
- Copy the Default Fee Schedule – Change the “Fee Schedule Version” name in the csv file according to the Billing Type(s) (e.g., Counselors). Note that this name will be visible when users add appointments or charges.
- Assign Billing Type(s) - add the Billing Type “Name” from Reference Data | Billing Types (e.g., Social Workers)
- Enter the modifier required by the payers for the procedure codes for the providers with this Billing type (e.g., modifier GY)
In summary, when a charge is created for the insurances in this financial class with the provider billing type the modifier from the fee schedule will automatically be added to the charge. This reduces the need for multiple procedure codes with the same CPT code to add modifiers by default.
DeleteDownload and Upload Fee Schedules
Users are able to download a fee schedule or a fee schedule version to allow edits to be made in a csv file and then upload to save the edits in the system.
Navigate to Persons & Institutions | Insurance Companies | Financial Classes tab
Locations of Fee Schedule Download Options
- Download Fee Schedules from the top row of buttons – exports all fee schedules and fee schedule versions for all financial classes into one csv file
- Download all date ranges from the Action drop down options far right of the fee schedule – exports all fee schedule versions for the selected fee schedule, regardless of whether or not they have been hidden by checking “Hide Fee Schedules for previous year”
- Download from the Action drop down options far right of fee schedule version – exports that specific fee schedule version
Click on a download option and open the csv file from the download location in the browser
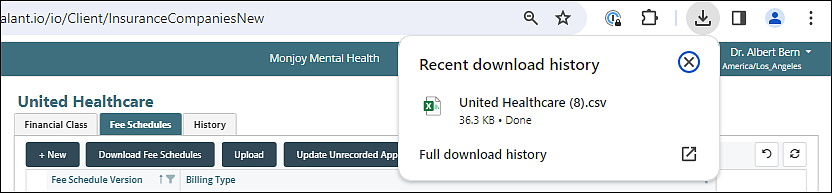
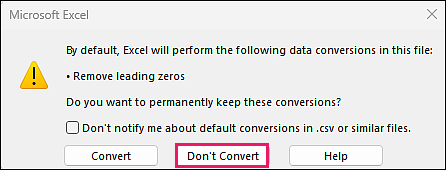
Click Don't Convert from the warning pop up window
Make any desired edits to the file and save. It is recommended to freeze the top row for easier editing.

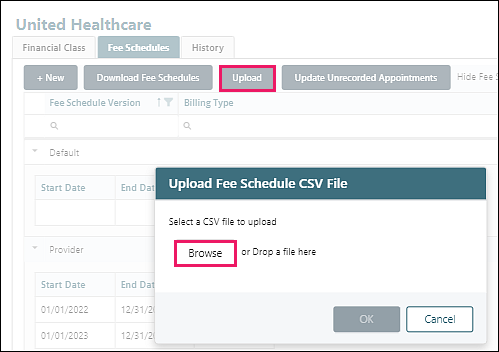
Click Upload, then Browse to select the updated csv file
Click OK to upload the file. If any data is incorrect on the file, an error message will appear, and the file will not upload.
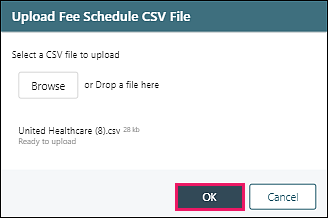
If the upload is successful, a new fee schedule will be created.
Delete